


商品の詳細
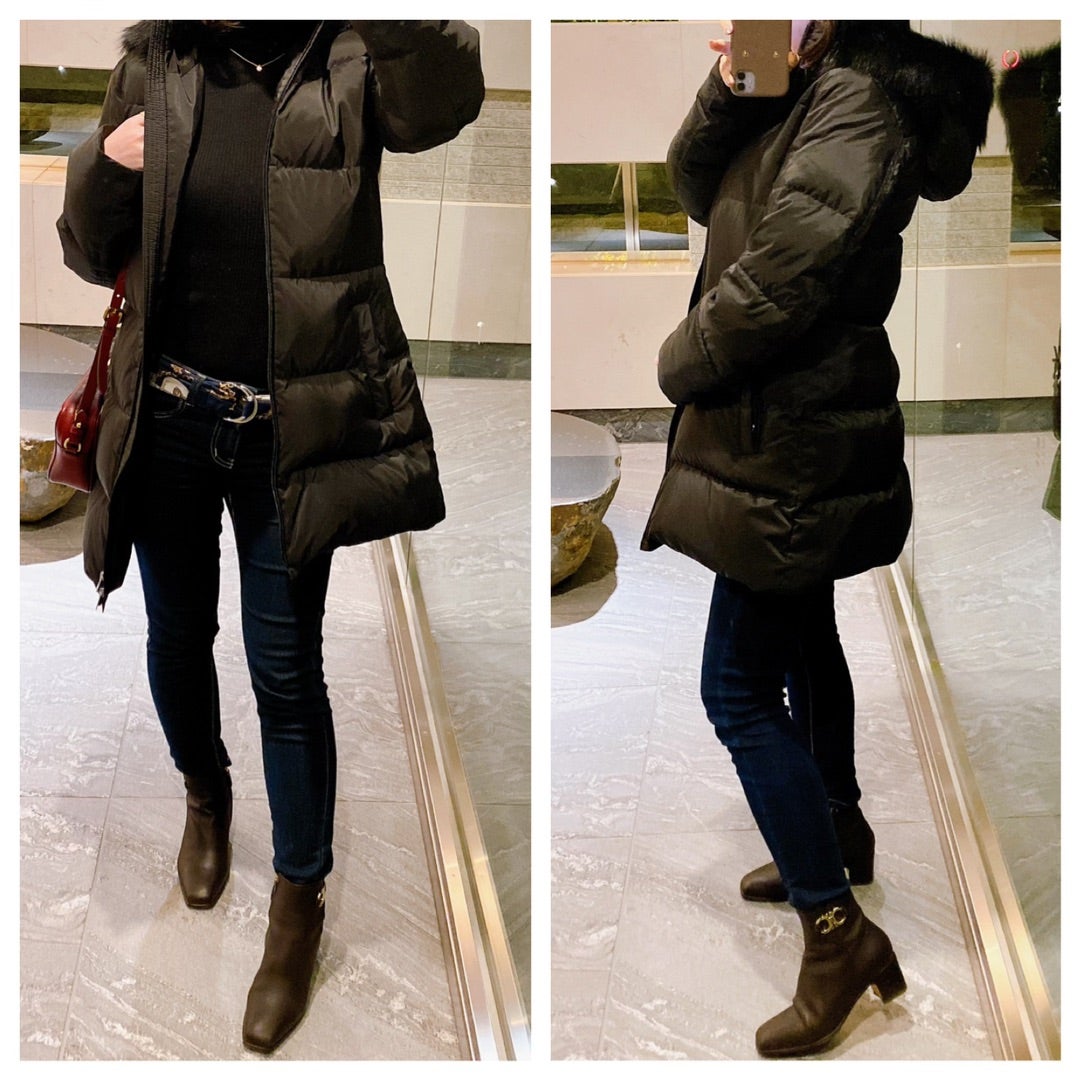
ブラックのダウンコートです。
ノーカラースタンドネックでシンプルに着こなせるかと思います。
ほぼ使用せず保管しておりましたので気になるところは見当たりません。
写真ご確認ください。
ノーカラースタンドネックでシンプルに着こなせるかと思います。
ほぼ使用せず保管しておりましたので気になるところは見当たりません。
写真ご確認ください。
商品の説明

アウトレット】PRADAダウンコート♪シープスキンファー29P117 (PRADA ...

オンラインストア限定】 プラダ レディース ダウン PRADA ブランド ...

SALE☆おしゃれ☆【PRADA】ロゴ メンズ ダウンジャケット (PRADA ...

PRADA (プラダ) ロゴプレート フルジップ ダウンベスト PRL29X131 ブランド レディース アウター|インポートブランドのメンズ服【サカゼン公式通販 】

累積売上第1位【PRADA☆プラダ】ダウンジャケット 291947_1WQ8 (PRADA ...

コンパクトなシルエットが逆に新鮮な「プラダ」の黒ダウン【全部試した ...

PRADA23冬】290543 カジュアル ダウンジャケット (PRADA/ダウン ...

プラダダウン☆ | www.innoveering.net

SALE【国内発送】PRADA◇メンズ 大活躍!ダウンジャケットSGA654 ...

PRADA (プラダ) ダウンジャケット グレー サイズ:42 冬物
PRADA プラダ】レディースダウンを使ったコーデ❤︎.*やっぱりパンツも ...
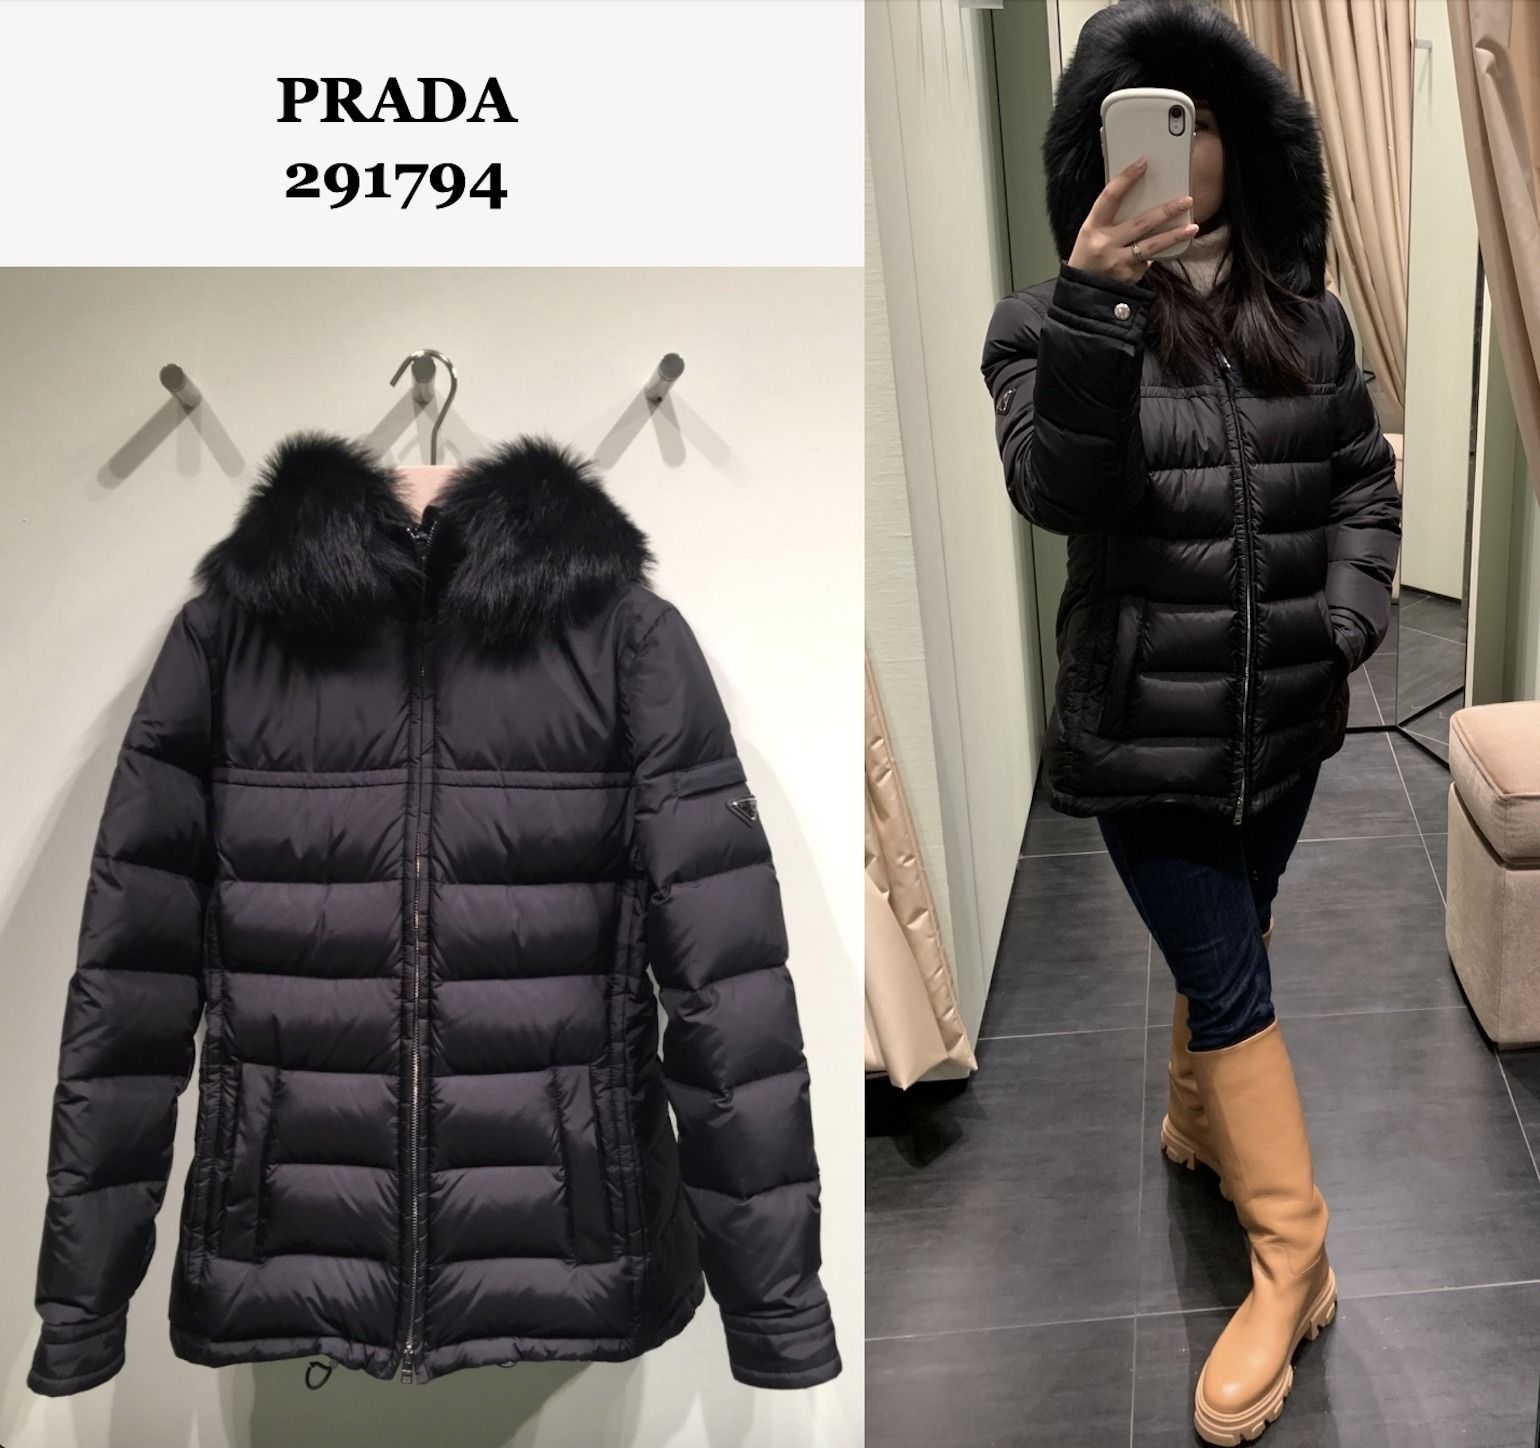
PRADA/直営】23冬 ファー付 ショートダウン 291794 (PRADA/ダウン ...

PRADA - PRADAダウンコート29E117 本物☆試着のみ美品☆岡部あゆみさん ...

プラダ、グッチ、モンクレール…大人が選ぶべき最新ダウン20選 PART.1 ...

PRADAダウンコートサイズ38 - ダウンコート


